In April I installed an MM3 modchip into my original PlayStation console. Modchips also exist for the PlayStation 2 and allow for things like playing games from other regions, playing PS1 and PS2 backups, and running homebrew applications. This blog post covers the installation of the Modbo 4.0 modchip into my SCPH-70012 PS2 slim console.
- An SCPH-70012 PS2 slim console
- Tools to take apart the PS2 slim
- A Modbo 4.0 or Modbo 5.0 modchip. They are pin compatible, I bought my chip from EurAsia.
- 30 AWG kynar insulated wire wrapping wire
- A soldering iron and solder
I initially installed a Modbo 4.0 chip, but ended up swapping it out for a Modbo 5.0 chip. The Modbo 5.0 chip allows booting homebrew directly off of USB flash drives, which is important since the PS2 slim doesn’t have support for an internal hard drive.
Playstation 2 Console
Tutos sur l'installation et la pose de puce (modchip) sur Playstation 2 et PsTwo Puceps2 Messiah 2 pro v1,33c, puce ps2 F 14. After installation. Oct 05, 2017 How to Install a PlayStation 2. Here is how to install a PS2 on a TV. When you're done, it's game time! Take the PS2 console, and gather up all of the cords. How to install Linux on the Playstation 2. Whatever your situation there are a surprising number of reasons to install Linux on a Playstation 2. Its PCB layout is a perfect 'L' shape which makes install a breeze. We believe this chip is a great solution for those looking for a compact and feature packed chip without the high price tag. We also want to explain to customers that there are two producers of the Modbo range of chips, first are the guys at Modbo.com who produced the Modbo 3.0. Schema Puce Playstation 2. Mdchips MONTPELLIER vous propose l'installation de puce, Flash, la modification, la vente de composants. An update to the PlayStation®4 system software was released on May 17, 2018. Use this update to install system software version 5.55. Always update your PS4™ system to the latest version of the system software.
I’d also like to mention that I was able to install the modchip with a pretty standard 1.6mm chisel tip on my Hakko FX-888D soldering iron. In other words you don’t need a super special tip for your soldering iron. You just need patience, good eyes, and a steady hand.
Hd Loader, backup your games on ps2 hardrive. Before you can use HDLoader, you will need the following.
At the time of writing this post I have installed a modchip into two different PS1 systems, two different PS2 systems, and soldered a Teensy to a PS3 slim. I’ve learned a lot along the way, so I’d like to share some tips that may help your modchip installation experience be a smoother one.
Since these tips apply across a lot of posts, I’ve put them into a single page that is linked to from multiple posts.
Above is an an image of the installation diagram for the Modbo 3.0 diagram for NTSC V12 PS2 slim consoles. This diagram is the same for Modbo 4.0 and Modbo 5.0 chips. If you need a diagram for another version of the PS2 just leave a comment and I’ll upload a copy for you.
As you can see from the diagram there are a total of 21 wires that need to be soldered from the PS2 to the modchip. The chip comes with double sided tape that you use to stick it to the board.
I chose to mount my modchip on top of the large chip in the middle of where all of the wires needed to go. I’d recommend finding a lower point on the board instead, since I had to cut away some of the metal shield later on to get the system put back together. You can see an image of the board and where I mounted my modchip above.
With the modchip mounted I soldered each wire to the board. I started with the pads to the right of the chip, and then followed a counter clockwise pattern around the modchip once I finished soldering wires to the pads. Above is an image of what my installation looked like after I finished with the pads.
I had the most trouble when it came time to solder wires to the holes, or vias, that are located under the modchip. Getting solder to stick to the holes was tricky, I’d recommend using some flux to help get the solder flowing. I inserted an image of wires attached so some of the holes above.
Eventually I finished soldering all of the wires to the board, and the image above is the result. As you can see I routed four ground wires to the ground pad in the diagram. I’d actually recommend routing the ground to whichever screw hole is closest to the modchip. It’s also a good idea to use more wires for the 3.3V line as well.
Once I had soldered the modchip to the board, I could put the console back together. I started by taping over all of the points I soldered to, including most of the modchip. Taping prevents any of the connections from being shorted with the case, and also helps hold the wires in place.
As I mentioned earlier, I didn’t choose the best position for mounting my modchip. I had to cut away some of the metal shielding to make room for the modchip. Removing the shielding still resulted in a very tight fit when putting everything back together.
I was able to install my modchip my first try in less than an hour. I found the installation process to be more difficult than the installation of a modchip on a PS1, or soldering a Teensy to a PS3 Slim.
Laser failure is a problem with V12 PS2 slim consoles, which can be prevented through various methods. From my understanding the best methods are somm0ne’s fix, and the PIC fix.
Puce Playstation
I also read that later date code V12 systems don’t have the issue. My PS2 slim is a later date code, so I’m going to see if anything bad happens, and just replace the laser if I have to. I’ll update this post if anything happens.
How to Download PS4™ System Software Files
Follow the instructions in this section, when you are unable to update the system software from your PS4 directly.
PS4™ System Software Update File
Downloading Requirements
A computer connected to the Internet.
An external storage device or a USB flash drive with at least 460 MB of free space.
Max payne 3 download highly compressed. The system software of the PS4™ system and system software updates installed on your system are subject to a limited license from Sony Interactive Entertainment Inc. Visit the System Software License Agreement for details.
Downloading Instructions
On the external drive, create a folder named 'PS4'. Inside that folder, create another folder named 'UPDATE'.
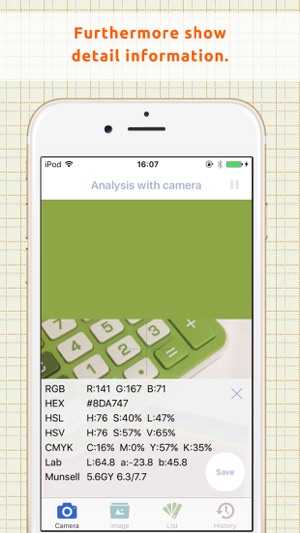
Munsell Color Palette. The above grids can be used to choose colors from the Munsell color system and display them in sRGB coordinates. The grids are (in order) value/chroma, chroma/hue, and value/hue. Jul 25, 2018 Can someone tell me where to insert the RGB values to change the color of text?
 CT&A RGB vs RGB L*a*b* input to Munsell. You can select any of the 4000 color chips in the Munsell Color Deck. You can convert to a combination of between two to. Color conversion. Color code converter. Color codes chart. Color conversions. Color code converter. HEX value is 6 digits (rrggbb). RGB values are in range of 0.255.
Download this file: agree to terms and download update.
Save your file in the 'UPDATE' folder as 'PS4UPDATE.PUP'.
If you get the error: 'SU-41350-3 - Cannot find the update file' it means that the PUP file was renamed by your computer due to multiple downloads of the same file.
Solution: Check the download location on your PC or Mac, delete any previous versions. Make sure the current the file is named: PS4UPDATE.PUP.
Access to and use of the PS4™ system software update are subject to your acceptance of the System Software License Agreement. Before downloading the system software update, you should carefully read and understand the terms of the System Software License Agreement.
Installation Instructions
Follow the PS4 installation instructions.
PS4™ Complete System Software File
A full system software installation is required when replacing the internal hard drive on your PS4.
Downloading Requirements
A computer connected to the Internet.
An external storage device or a USB flash drive with at least 1.1 GB of free space.
Downloading Instructions
- On the external drive, create a folder named 'PS4'. Inside that folder, create another folder named 'UPDATE'.
Download this file: agree to terms and download complete software.
Save your file in the 'UPDATE' folder as 'PS4UPDATE.PUP'.
If you get the error: 'SU-41350-3 - Cannot find the update file' it means that the PUP file was renamed by your computer due to multiple downloads of the same file.
Solution: Check the download location on your PC or Mac, delete any previous versions. Make sure the current the file is named: PS4UPDATE.PUP.
Installation Puce Playstation 2
Access to and use of the PS4™ system software update are subject to your acceptance of the System Software License Agreement. Before downloading the system software update, you should carefully read and understand the terms of the System Software License Agreement.
Installation Instructions
Follow the PS4 installation instructions.